
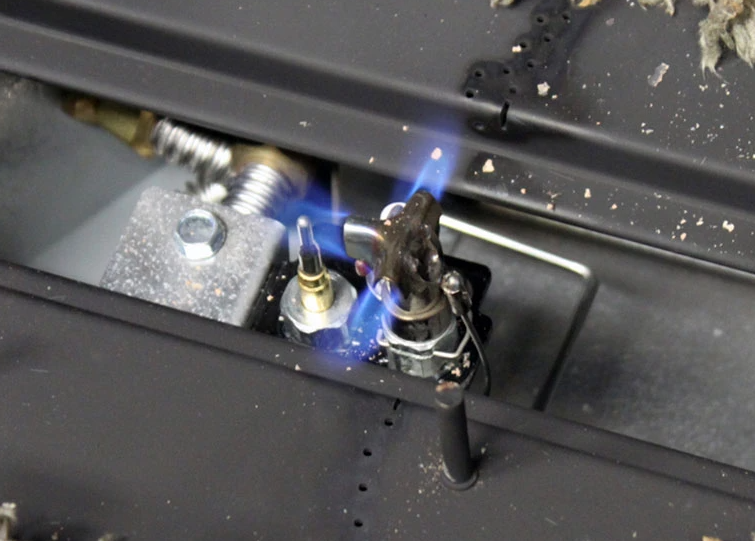
If you’d prefer to see a video demonstration, please go here.
If the pilot light is out on your gas fireplace and you did not deliberately turn it off, I strongly recommend you schedule a service call to see if there are any repairs that need to be made. Pilot lights are not supposed to go out on their own and when they do, it’s usually an indication something is going bad.
These instructions will work for the majority of gas fireplaces. There may be some models of gas control valves that look or operate slightly differently.
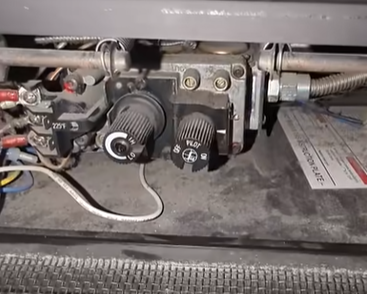
There are two main types of ignition systems. These instructions deal with “millivolt” systems. You can tell if you have a millivolt system if there is a knob with the words “OFF”, “PILOT”, and “ON” in the fireplace’s control compartment. If you do not see a knob with those words, or some variation of those words, then you likely do not have a millivolt system and there are no manual controls for a pilot light.
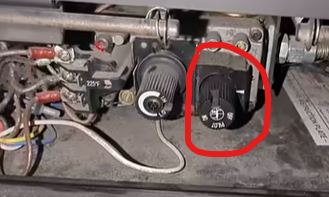
If you do have a millivolt system, then please continue.
PILOT LIGHTING INSTRUCTIONS
STEP 1
Ensure the gas supply is turned on. You should have a gas shutoff valve somewhere in or around the fireplace. The handle of the valve should be parallel to the piping when it is in the “ON” position. If you have a propane tank, make sure the tank is turned on by rotating the tank valve counterclockwise, and that the tank has sufficient fuel by checking the gauge (should be above 20% in most cases). If you have a wall valve with a key, again, rotate it counterclockwise until it stops (it may only be ¼ turn).
STEP 2
Locate the control knob with the words “OFF”, “PILOT”, and “ON” as well as the indicator arrow inside the control compartment of your gas fireplace.
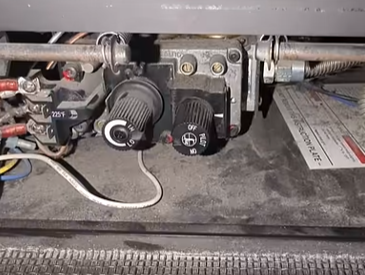
Turn the knob so that “PILOT” is aligned with the indicator. You may need to press the knob in slightly to turn it, depending on the model. Make sure you can use the valve and see the pilot assembly at the same time before moving on to the next step.
STEP 3
Press the knob all the way in until it stops. This is now allowing gas to flow to the pilot assembly. At the same time you are holding the knob in, press the spark button and look for a flame at the pilot assembly. Continue pressing the spark button until you see a flame.
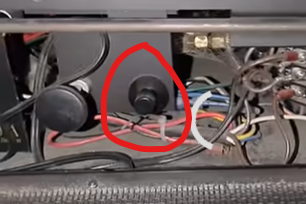
If you do not see a flame after attempting for 30 seconds, STOP and let the fireplace sit for at least 1 minute before attempting again to avoid a build-up of gas.
Once the pilot flame is lit, CONTINUE HOLDING THE KNOB IN for 15-30 seconds. This will allow the heat of the pilot flame to begin generating an electrical charge to keep the pilot lit.
STEP 4
Slowly let the knob back out and make sure the pilot stays lit. If the pilot stays lit, then turn the knob so that “ON” is aligned with the indicator. If you do not align “ON” with the indicator, the main burner of the fireplace will not turn on.
Allow the pilot to run for at least 1 minute, then turn the fireplace main burner on to test it.
NOTE
I want to reiterate that pilot lights are not supposed to shut off on their own under normal conditions. If you did not intentionally turn your pilot off, then I strongly suggest you schedule a service call.
If these instructions do not seem to apply to your specific fireplace, feel free to give us a call or send us an email if you’re in the Washington DC area, or contact your local hearth dealer if you are not.